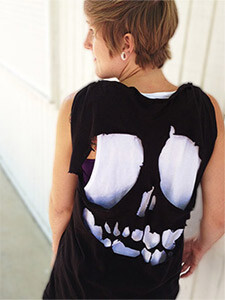
Skull-Back Tank - Sherlock: Skull On The WallCutting up or styling T Shirts is an enticing way to add your own unique style to an already incredible work of art. The most successful graphic tee remixes preserve the original artwork instead of compromising it. |  |

 |  |
Materials Needed: One oversized Design By Hümans T Shirt, a pair of fabric scissors, a marker, a piece of paper large enough to cover the back of your tee, and some awesome music to inspire your creativity. The graphic tee featured in this tutorial is 'Sherlock: Skull On The Wall' by Hüman zerobriant. Or check out our collection of skull shirts for your own unqiue style.

 |  |
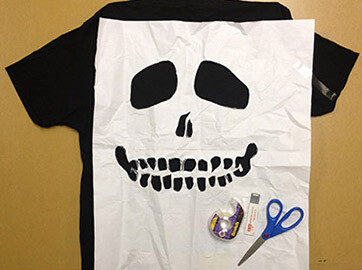
For Step Two you will need your marker and your piece of paper. Using your marker, begin draw out the outline of the main facial features of a skull. Don't stress about making this part perfect. The messier the stencil, the grungier your final tee will turn out. You'll find out later that the stencil won't look much like your final result. Now draw some creepy snarled teeth and two big empty eye sockets.

 |  |
Now that you've sketched out your skull face drawing, the next step is to begin cutting out the shirt. For this step you will need your fabric scissors. Carefully cut out each shape on the page. Don't worry about cutting inside our outside of the lines, it won't matter! But do be careful not to cut the negative spaces between shapes - this will make it more difficult to use the stencil in Step Five.

 |  |
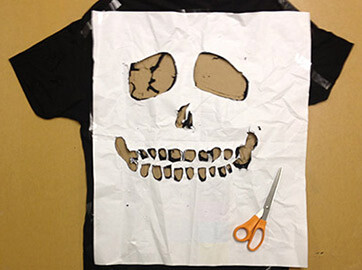
Once you've finished cutting out all of the shapes on the page, you have a finished stencil, ready to go to work on your cool skull cut tee! The next step is placing the stencil over the back of your Design By Hümans T Shirt. Place a firm surface between the layers of your tee to prevent cutting up the front side - I used a piece of cardboard. Position where you want the design, and tape it down to keep the design steady for cutting the skull face.

 |  |
Using your fabric scissors, cut out all of the areas of the T Shirt that show through your stencil. Perfection doesn't matter here either - the messier the cut, the grungier the look! When cutting out the teeth, it's helpful to pull a small amount of fabric through each hole and snip it. An average pair of scissors probably won't fit into those holes. After you've finished cutting, remove your stencil and start stretching out the fabric. Stretch out the eye sockets and pull on the teeth holes, without ripping any of the material between them.

 |  |
This final step is optional. If you would rather wear an awesome ripped up skull tank than a T Shirt, you will need your fabric scissors All you will need to do is carefully remove the collar and sleeves of the shirt, cutting along the seams. If you decide you want a more low-cut neck or larger sleeve holes, additional cutting and stretching is up to you. Be creative and unique, but be respectful of the artist's design!

 |  |
Now that you've finished your cut up skull tee, there are countless ways you can wear it. Pair it with some dark skinny jeans and combat boots, or wear it as a dress. Wearing a bright tank top under your new tee will cause your design to pop and will definitely draw some attention to it. You now have your very own unique tee with cool graphic art, and a personal custom cut touch!
Featured TeeThe graphic tee featured in this tutorial is 'Sherlock: Skull On The Wall' by talented designer Anthony Brian Villafuerte, zerobriant. More of zerobriant's tees can be found in his collective store. He has had six tees printed in Daily Design Contests and currently has 32 tees available in his collective store. zerobriant is a talented illustrator from the Philippines as well as a registered nurse, a professional photographer, and a businessman. He claims to be a Jedi, and the design force is strong in this one. |  |
Skull-Cut Tee Video Tutorials
You can check out these videos for other ideas and techniques for make your own skull cut tee